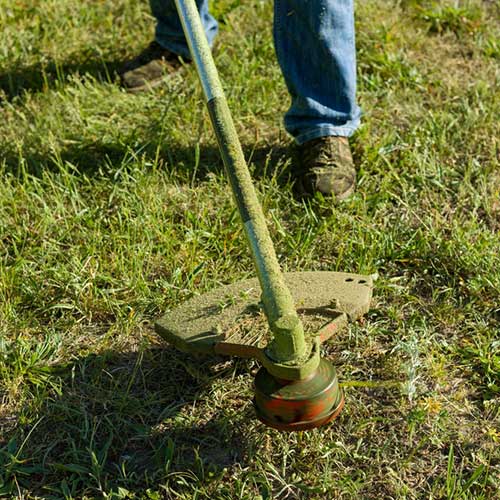
If you’re fortunate enough to have an outdoor space in your home, such as a garden or even just a small lawn, then chances are you also enjoy taking care of it.
The two main tools for doing this are a lawnmower to take care of the main body of grass and a strimmer to tidy up the edges or around awkward parts that you can’t get your mower into.
Strimmers are also great for getting stuck into tough weeds that the mower just can’t manage.
Using a combination of a lawnmower and a strimmer to maintain your garden is the best way to keep your grass looking fresh and healthy. As with mowers though there are a lot of tips and tricks to help you use a strimmer safely and effectively. Just like with a mower, though, never try to strim in the rain!
This guide will show you some of these tips to make using your strimmer much easier and safer for you, so let’s get into it.
Safety First
Just like any garden equipment with moving parts, there are some safety tips that you should be aware of.
1. Get Proper Protective Gear & Careful of Debris
Some of the strimmers on the market can spin their line at 3000 rpm, so some protection is key.
Eye and face protection are definitely a must when using a strimmer, as you can expect a good amount of debris flying around (such as small stones, twigs).
Some tougher gloves and sturdy, close-toed footwear are also recommended.
Like any appliance with a motor, strimmers can also be quite noisy, so ear protection is also something you can invest in.
2. Keep an Eye Out for Trip Hazards and Cables
If you’re using an electric powered strimmer, then you’ll also be trailing a cable with you.
A strimmer will have about as much trouble cutting through this cable as it will with grass and weeds, so make sure you know where it is at all times!
As well as the risk of cutting through it, there is a trip hazard associated with this cable, so keep your eyes open and try to avoid moving backwards too much during your session.
3. Keep the Strimmer Pointed Away from You
This is an obvious one, but never bring the business end of a strimmer towards you.
This risk is mitigated a lot by using a harness with your strimmer as you can’t turn it round that much to face you.
If you need to check something at the spinning end or carry out any maintenance, make sure you switch it off and let it cool down for a few minutes before going anywhere near it.
4. Take a Break When Needed
Just like with any activity, taking regular breaks is a big deal.
The vibrations and noise produced by a power tool can start to cause strain on your body if you use them for an extended period of time.
If you’re wearing some of the protective gear mentioned above, then this strain will be somewhat alleviated, but if you start to feel fatigue coming on, then take a break (or even leave the rest to the next day).
Staying hydrated and taking care of your health is always the highest priority.
Before Strimming
Now that you know the safety aspects, let’s look at what you can do before strimming to make the session easier.
5. Read the Instructions
This, again, might be an obvious one, but the instructions of your specific strimmer model are always going to be the best source of info on how to use it effectively and what its limits are.
It is also the best place to find technical info like strimmer speed and power consumption.
6. Prepare the Garden
Like I said before, you’ll want to wear protective eye and face equipment to protect against debris that gets lifted by the strimmer.
You can check over the area you’re going to be working on and try to remove anything you think will be caught in the strimmer.
Clear away garden furniture and ornaments to save you working round them awkwardly or stopping in the middle of the session.
Keep pets and children away from where you’ll be working.
Once you’ve got your safety gear on and have started up the strimmer, it’s time to get cutting!
Best Practices During Strimming
Now that you have a clear area and are suited up to go, you can start strimming. Here’s some tips to help make the session the most effective it can be.
7. Go With The Cutting Direction
Strimmers will rotate in a certain direction. You can find which way yours spins in the instructions.
Because of this, there will be a best cutting side and this will be the opposite side that grass is ejected. So if your strimmer spins clockwise, the grass will come out the right hand side, making the left side of the strimmer head the best cutting edge.
This helps you keep the patch that you’re strimming clear, as you want to move towards the best cutting side, to avoid ejecting debris and grass onto the uncut patches.
8. Work With The Maximum Cutting Power
As well as cutting direction, it’s good to know where the best cutting power comes from.
Just like a blade, a strimmer wire will have a “sharpest” point where it’s easier to cut through stuff.
For a strimmer, this point is the end of the wire (because of physics, which I won’t get into here), so keep that in mind if you come across some particularly tough weeds.
9. Work On Clean Edging
To get a good clean cut on borders where grass meets your drive or flowerbeds, then you want to get this technique right.
To do this effectively, hold the strimmer so that the end is flat and parallel to the ground and adjust your cut height to whatever you like and keep that height constant during the edging.
This will get easier over time and if you keep doing it regularly, eventually you’ll achieve that neat finish at your borders.
10. Like A Hairdresser Learn Tapering
You can use this technique to give a good blended effect of grass height around obstacles, rather than having a straight line cut right next to them, which can look quite unnatural.
To get this effect, tilt the strimmer head away from you, towards the object that you’re trimming around.
You can adjust the height to blend the tapered grass with the height that you have mowed your grass to with the mower.
Following these tips will give you a pristine looking lawn, especially if you can blend the use with a lawn mower.
Summary
There you have it! Most of these tips are probably very familiar to you if you already regularly use a strimmer and/or mower, but maybe some of the more technique focused ones will have been useful.
As always, check the manufacturer’s instructions for anything you’re unsure about and stay safe!
Related Reading
10 Best Strimmers For Long Grass UK 2023 (An Expert Buyer’s Guide)
10 Best Budget Strimmers Under £50 UK 2023 (An Expert Buyer’s Guide)
10 Best Petrol Strimmers UK 2023 (An Expert Buyer’s Guide)
10 Best Strimmers For Brambles UK 2023 (An Expert Buyer’s Guide)
12 Tips for Using Your Lawmower